
Need to Rewind?
Did you miss the first part of our blog series, Getting Started With Dante? We covered what makes Dante different, the basics of Audio over IP networking, and some of our Dante enabled studio builds to give you an idea of what you can expect. Click below to revisit Part One to make sure you’re up to speed!
Growing Up Without Growing Pains
In the first part of our Dante series, we covered some basics of what Dante is. From Audio over IP to the different Layers of a computer network, we learned why Focusrite is the perfect match for this technology and how its workflow is superior to the ways of the past. Today we’re taking a deeper dive into how some of the benefits of using a Dante-based system can be tailored to your specific needs by expansion. We’ll also show you some examples of what is possible with a Focusrite Dante setup that you might not have known about before.
I'm In!

So you’ve decided to incorporate Dante into your audio system. Whether it’s your recording studio or your live sound rig, it’s sure to make a considerable improvement in your daily workflow by saving you time, space, and headaches. But how do you go about taking this leap from the past into the brave new world? Let’s take a look at your existing setup and see where you might be able to change things up.
Routing Headaches
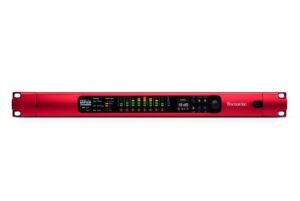
In your music studio, you have all of your favorite gear that you use every day. From hand-picked outboard pieces to your favorite analog and digital synthesizers, you took your time designing a workflow that works best for you. But some things are always a pain in the you know what. Routing and rerouting between instruments and gear can create a rats-nest of patch bays and cables. Recording in the other room suddenly becomes a science experiment with cables running under doors. Not surprisingly, staying inspired and going with the flow is hard to do. Enter Focusrite’s Red and Rednet line of powerful Dante-enabled interfaces.

The first to offer IP network audio interfaces for the recording studio, Focusrite Red and RedNet interfaces are perfect for routing audio with high channel counts and virtually no latency. Focusrite’s top-of-the-line range of Ethernet-networked Audio over IP interfaces are based around Audinate’s industry-standard Dante Ethernet audio networking system. With a Focusrite Red interface, you can immediately use the DigiLink and Thunderbolt ports to interface with your preferred DAW and tap into world-class digital conversion, remote-controlled mic pres, and built-in monitor controls. (This also marks the first time you’ve been able to use the same interface for Pro Tools HD and Ableton Live).
Stepping It Up
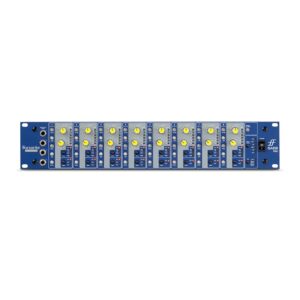
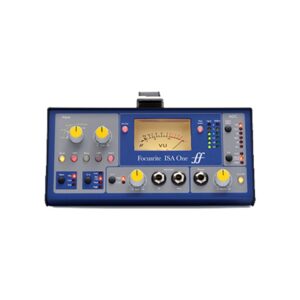
So you decided to step into the world of Dante, and now you’re thinking you want to be able to handle more I/O. If you’re looking to record drums, the Focusrite ISA 828 is your perfect match. With 8 Classic ISA mic pres, you can mic up your kit and get things rolling. The beautiful thing about having a Focusrite Pro Dante system is that you can quickly and affordably add inputs if you want to down the road. You can connect your ISA 828 to any Dante-enabled device and seamlessly add I/O to your setup as fast as you can plug an Ethernet cable in. This turns plug-and-play into a reality, which can open up the doors for you to experiment with your sound, quite literally.

That concrete stairwell down the hall? Turn it into your echo chamber and route signal to it from anywhere on your network with ease. Maybe you want the flexibility of recording a full band outside or at your local music venue? With the Focusrite Red series, you can load into the venue and connect via Dante to the entire network of Dante-enabled devices with one simple Ethernet cable. This gives you the flexibility to route any physical input or output on the network to any Pro Tools channel so you can customize your recording layout and send it to hardware inserts with ease.
The Ultimate Control
With the added benefit of Dante controller, you can simply route signals throughout the network. The controller software (did we mention it’s FREE?) automatically detects all other devices in the network so that you can see all of your I/O visually in one place. In Dante controller, your sources are called “Transmitters,” and all of your destinations are called “Receivers.” Naming all of your Transmitters and Receivers is easy, and you can also save your I/O as presets, just like in Pro Tools for fast and easy recall. With the click of a mouse, you can route any Transmitter to any Receiver shown in the diagram below.

On The Net
If you’re looking to step up your line-level I/O, the RedNet HD32R is an incredibly simple means of converting 32 channels of audio and delivering it somewhere else on your network at near-zero latency. With only one RedNet 3 interface, you can connect existing digital audio systems and components to your RedNet network with up to 32 inputs and outputs and tap into them via remote control. The unit includes I/O for AES, S/PDIF, and ADAT connections and allows the RedNet system to be synchronized with a word-clock source. This enables you to route signal to and from your favorite gear, including synths and outboard processing.

This can also change the composition of your studio. You can explore having a live recording or work area anywhere you want with a simple Ethernet connection, expanding the limits of your studio and allowing you to harness your creative prowess.
Limitless Possibilities
These are just a few of the benefits when incorporating Dante into your existing workflow or even replacing large parts of it all together. Dante unlocks the next generation of possibilities when it comes to making music, from Dante Controllers’ intuitive and simple design to the ease of routing signals anywhere on your network. What used to be a confusing and stubborn set of tools has become a fluid and dynamic set of opportunities for creativity. Gone are the days of long cable runs and stuffy recording studios. We want to make music in new places, with more gear, in half the time. Dante gives you all the modular flexibility you could ever dream of, so you can keep the session going without unplugging everything twice.
Stay Tuned for Part 3!
In the last part of our three-part Dante blog series, we’ll cover how some of the pros have incorporated Dante into their workflows, as well as give you a sneak peek into some creative uses for getting outside the dreaded “box.”
Subscribe Below
Dante Ready Staples
-

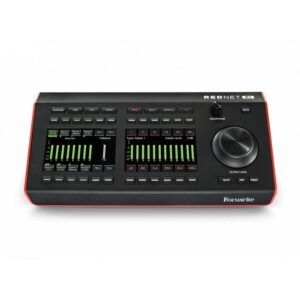
Focusrite RedNet R1 Desktop Remote Controller
$1,099.99Add to WishlistAlready In WishlistAdd to cartAdd to Wishlist -
-
Focusrite ISA 828 MkII 8-Channel Mic Pre
$2,999.99Add to WishlistAlready In WishlistAdd to cartAdd to Wishlist -

-

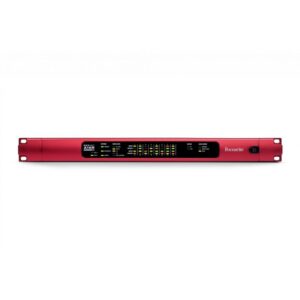
Focusrite MP8R 8ch Ethernet Interface
$3,999.99Add to WishlistAlready In WishlistAdd to cartAdd to Wishlist -
Focusrite ISA One Desktop Microphone Preamp
$699.99Add to WishlistAlready In WishlistAdd to cartAdd to Wishlist
Have Any Questions?
Still have questions about these promotions?
Our Pros are glad to answer any questions you may have and help find the best option for you!
Send Us An Email:
Or Give Us A Call:
Los Angeles
323-845-1145
Nashville
615-806-7556
Finance Your Dolby Atmos Room with All Media Capital
Learn MoreOur LA Showroom has Moved!
Learn More