


In the first part of our guide to Dolby Atmos, we covered what you need to get started and some ways you can adapt new technology to your current workflow. But all of this begs the question, “where do I go from here?”.
Well, fear not! In this article, we’re going to cover the perfect place for you to start and how you can expand your Dolby Atmos system over time so you can build a solid foundation and watch your immersive rig grow.
When you put together your first recording rig, it may have consisted of borrowed gear, old equipment, or tools that you might not have known how to use properly. Investing in and building a workflow that gives you what you truly need to be creative can be a delicate decision-making process. Well, you’re in luck, because we’ve taken the guesswork out of it for you! Below you’ll find a few starting places and options for how you can expand each one down the road. Building upon the foundation you started with so that no piece of equipment is thrown into the gear closet.
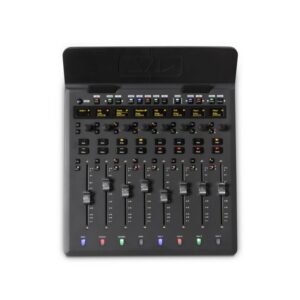
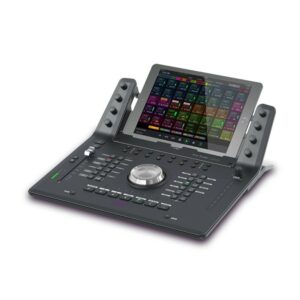
This option really highlights the possibilities of what you have access to with a very limited budget. This headphones-only bundle comes in at a total cost of $3,500, this Dolby Atmos rig is more affordable than most pairs of professional studio monitors these days. Utilizing your current interface is a great way to save money until you’re ready to step up your monitoring game. Including the powerful yet sleek Avid S1 and Avid Dock, you’ll have tactile control over all of your mix elements and the ability to mix and pan in Dolby Atmos with ease.
Plus, when you buy Pro Tools Studio you’ll be eligible to purchase Dolby Atmos Production Suite for only $99! And if you feel you can’t afford the upfront cost but want to jump into action now – Westlake Pro proudly offers 48-Month Special Financing* on Avid products giving you time to get the gear you want.
*Subject to credit approval. Minimum monthly payments required. For more details, click here.
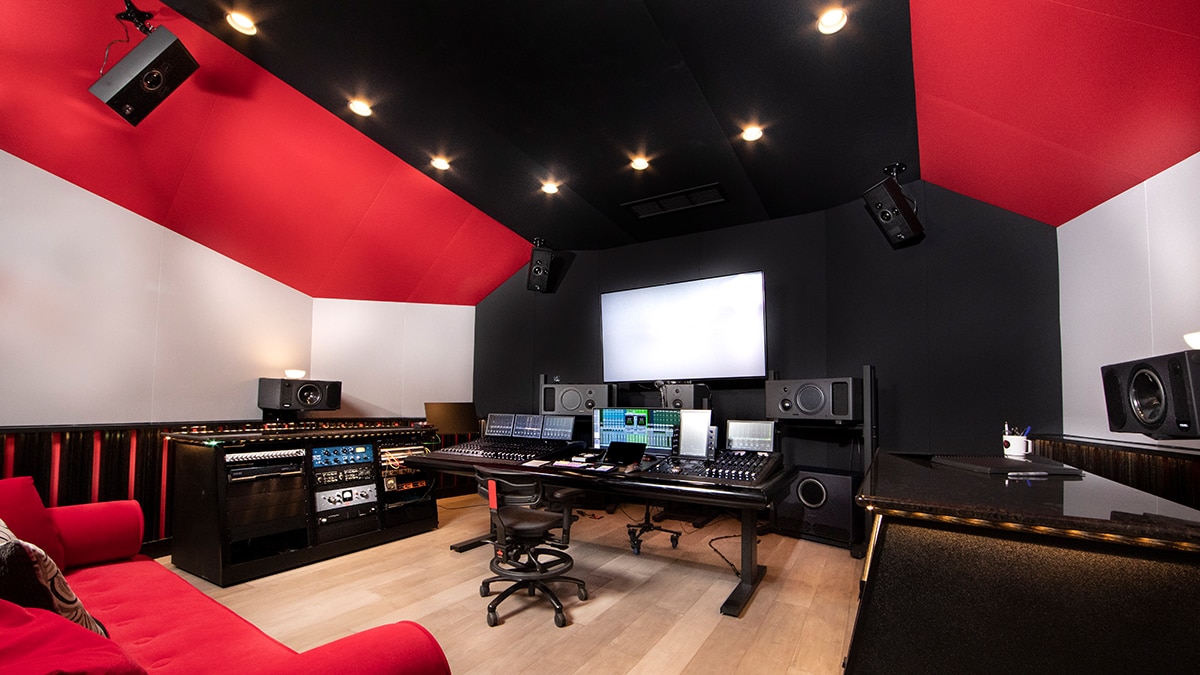
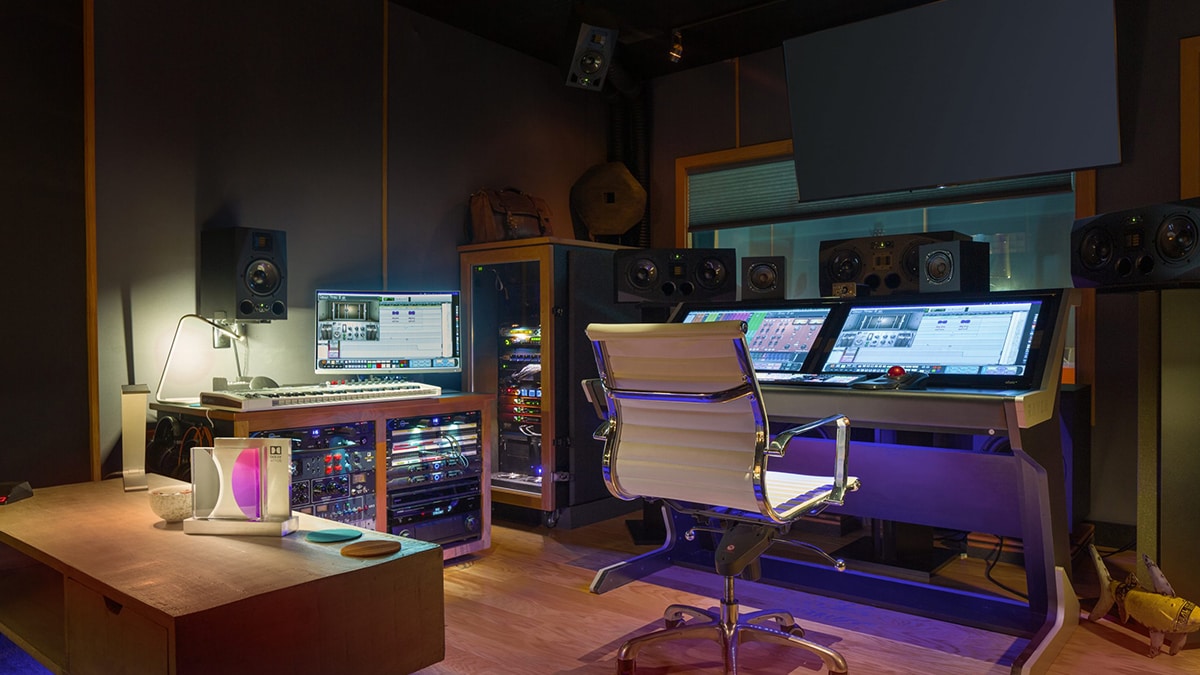
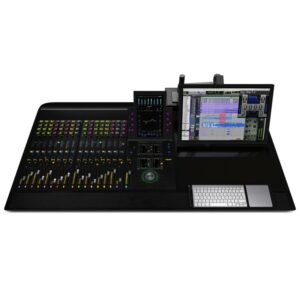
If you’re looking to take your control room from stereo to Atmos, this is the option for you. The Avid MTRX Studio gives you the I/O you need to handle Dolby Atmos playback, as well as SPQ room tuning capabilities, so you can dial in the perfect sound to ensure your projects translate without fail. With Atmos-ready monitoring options from Genelec, and affordable choices from Kali Audio (see our interview with GRAMMY Award-winning Recording engineer and Kali Audio enthusiast Mills Logan), you can outfit your control room and tune it to Dolby Atmos specifications easier than ever.
But don’t forget, you’re going to need a way to mount all of these speakers in your studio, and Triad-Orbit mounts can take the headache out of setting up your monitors to be precise and safe. You’re going to want to make sure your system is set up and tuned properly to ensure your projects translate everywhere you take them.
In order to make sure your system is set up and tuned properly and ensure your projects translate everywhere you take them, call in the professionals and have the Westlake Pro Design Services Group dial in the perfect sound for you and your studio.
By pairing your Avid MTRX Studio with the Avid S1 and Avid Dock, you can give yourself the tactile worksurface your workflow (and heart) desires.

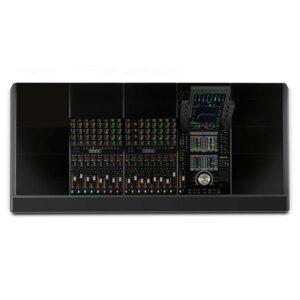
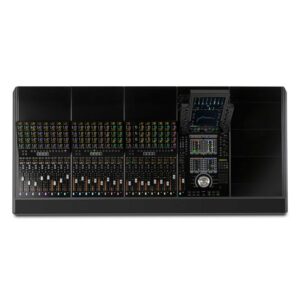
For the most functional and workflow-friendly control surface, look no further than the industry standard Avid S6. With the Avid MTRX handling playback responsibilities, the S6 can be the workhorse you need to take even the most complex Dolby Atmos productions across the finish line. With it’s modular design, you can customize this state-of-the-art control surface to meet you and your clients’ workflow needs.

This is the name of the game with the Avid S6. You can build your entire post-production facility around this powerful control surface. Add buckets of faders or knobs at your behest! Click below to start customizing your very own S6 and consult a Studio Design Group professional.

These are all great options that range from just getting your feet wet with Dolby Atmos, to accommodating the biggest sessions imaginable. The keys to this new world of production are in your hands, and the possibilities are endless. In the next portion of our guide to Dolby Atmos, we’ll take a look at some examples of what’s possible once you’ve built the backbone of your Dolby Atmos system, ways you can use interfaces and control surfaces in your immersive workflow, and some solutions for more complex studio integration.
© 1969–2024 Westlake Pro. All rights reserved.
Privacy Policy | Price Policy
| Cookie | Duration | Description |
|---|---|---|
| cookielawinfo-checkbox-analytics | 11 months | This cookie is set by GDPR Cookie Consent plugin. The cookie is used to store the user consent for the cookies in the category "Analytics". |
| cookielawinfo-checkbox-functional | 11 months | The cookie is set by GDPR cookie consent to record the user consent for the cookies in the category "Functional". |
| cookielawinfo-checkbox-necessary | 11 months | This cookie is set by GDPR Cookie Consent plugin. The cookies is used to store the user consent for the cookies in the category "Necessary". |
| cookielawinfo-checkbox-others | 11 months | This cookie is set by GDPR Cookie Consent plugin. The cookie is used to store the user consent for the cookies in the category "Other. |
| cookielawinfo-checkbox-performance | 11 months | This cookie is set by GDPR Cookie Consent plugin. The cookie is used to store the user consent for the cookies in the category "Performance". |
| viewed_cookie_policy | 11 months | The cookie is set by the GDPR Cookie Consent plugin and is used to store whether or not user has consented to the use of cookies. It does not store any personal data. |
Contact Westlake Pro’s Design Services Group for a free consultation about your next project.
We hate spam. We don’t share your information with any third parties.